When it comes to customizing mechanical keyboards, firmware plays a crucial role in unlocking advanced features. QMK and VIA are two of the most popular firmware options, allowing users to remap keys, create macros, and enhance their typing experience. But which one is right for you? In this guide, we’ll break down the key differences between QMK and VIA, their advantages, and how they impact your keyboard’s functionality. Whether you’re a beginner or an enthusiast, understanding these firmware options will help you make an informed choice.
What Is Keyboard Firmware?
A firmware is a program embedded in your hardware, it provides the instructions for starting, and powering off, and enables your keyboard to function correctly. Keyboard firmware has some more features, they allow you to set layers, set macros, change key binds, and change the RGB. In this article, we will cover the two most popular keyboard firmware right now, QMK and VIA.
QMK (Quantum Mechanical Keyboard Firmware) Overview
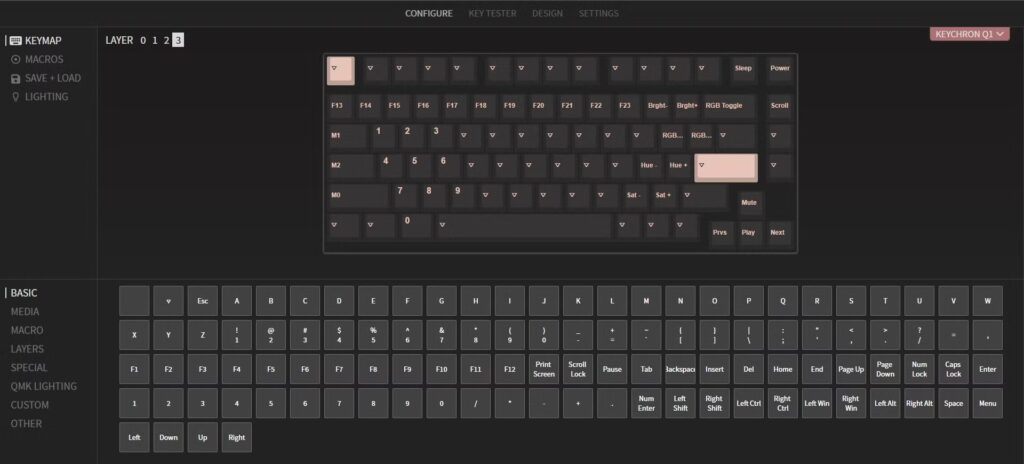
QMK is an open-source community firmware that is highly customizable and it is preferred by many professionals. QMK also has a series of other tools, like QMK Configurator and QMK Toolbox. QMK is also a popular choice among keyboard enthusiasts, with features like macros, supporting layers, mod-tap, split keyboards, backlighting, and mouse keys. To change keybinds and remap keys in QMK, you do need to know a little bit of code. You also need to know how to flash/reflash files like a .hex or a .bin file.
VIA Overview
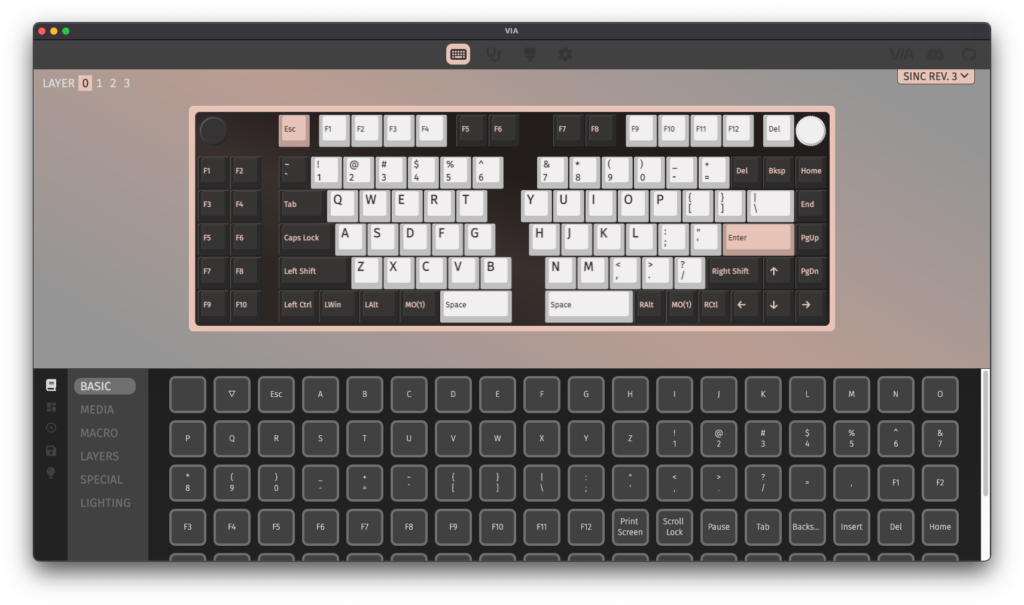
VIA is another popular keyboard firmware, it is user-friendly, allows for real-time customization with just a few clicks, and doesn’t require any code to run. You can change the RGB, change keybinds, change the layout, make layers, and program macros. You don’t need to flash/reflash files, and your configurations will stay on your keyboard even if you turn it off. VIA has two tools, VIA firmware and VIA configurator. The configurator does the functions listed above, and the firmware can work side by side with QMK.
Which Firmware Is Right For You?
Choosing between QMK and VIA depends on your experience level and customization needs. Here’s a quick breakdown to help you decide:
- Choose QMK if you want maximum control. QMK is perfect for advanced users who enjoy deep customization, writing their own keymaps, and using complex macros. If you’re comfortable flashing firmware and want access to features like tap-dance, layers, and custom RGB effects, QMK is the better option. It is best for enthusiasts and programmers.
- Choose VIA if you prefer simplicity and real-time changes. VIA is ideal for beginners and casual users who want an easy way to remap keys and create macros without flashing firmware. It provides a seamless user experience with an intuitive interface, making it perfect for those who want quick and hassle-free customization. It is best for those who want plug-and-play customization.
| QMK | VIA |
| Requires Code and Setup | Beginner Friendly |
| Offers Deeper Customization | Simple Customization Options |
| Compatible With More Keyboards | Requires Firmware Support |
| Requires Flashing | Instant Remapping |
| Open-Source, Has A Larger Community | Streamlined |
Getting Started With QMK
- Check Keyboard Compatibility – Not all keyboards support QMK. Check the official QMK GitHub or your keyboard manufacturer’s website.
- Install QMK Toolbox – Download and install QMK Toolbox to flash firmware onto your keyboard.
- Download or Create a Keymap – You can use pre-made keymaps or customize one using QMK Configurator.
- Flash the Firmware – Connect your keyboard, enter bootloader mode, and use QMK Toolbox to flash your custom firmware.
- Test & Adjust – Once flashed, test your key layout and make further modifications as needed.
Getting Started With VIA
- Check Keyboard Compatibility – Visit Can I Use VIA? to see if your keyboard supports VIA.
- Download VIA Software – Get the latest version from VIA’s official site.
- Enable VIA Support (If Needed) – Some keyboards require flashing a VIA-compatible QMK firmware before using VIA.
- Customize Your Keymap – Open VIA, connect your keyboard, and start remapping keys, assigning macros, and adjusting RGB lighting in real time.
- Save Your Layout – VIA automatically saves changes, making it easy to tweak settings anytime.
Conclusion
Both QMK and VIA are powerful firmware options that allow you to personalize your mechanical keyboard experience. QMK is best for advanced users who want full control over key functions, macros, and custom layers, while VIA is ideal for those who prefer real-time adjustments without dealing with firmware flashing.
If you’re just starting out, VIA is the easiest way to begin customizing your keyboard. But if you’re ready to take your setup to the next level, learning QMK will unlock the full potential of your keyboard.